


How to Make Volume Lash Fans (2026 Step-by-Step Guide)
Quick Answer: To make a handmade volume lash fan, pick up 2–10 ultra-thin extensions (0.03–0.07mm) from a lash tray using curved volume tweezers, fan the fibers out using the shimmy or pinch-and-roll technique, then dip only the base in adhesive and place it directly on one isolated natural lash. The base must pinch together cleanly so the fan sits flush at the root without weight distribution issues.
Table of Contents
- Why Handmade Fans Still Beat Premades
- What You Need: Tools and Lash Specifications
- Step 1: Choose Your Lash Diameter and Fan Size
- Step 2: Isolate the Natural Lash
- Step 3: Pick Up Multiple Fibers from the Tray
- Step 4: Open the Fan (3 Methods)
- Step 5: Check Symmetry Before You Dip
- Step 6: Adhesive Application
- Step 7: Placement and Wrapping
- Pro Tips from 17 Years of Lashing
- Frequently Asked Questions
Why Handmade Fans Still Beat Premades
Premade fans are fast, but they have a fixed base width and a set number of lashes per fan — which means they cannot adapt to the variation in your client's natural lash density, curl pattern, or lash line shape. Handmade fans let you build each fan on-demand: you control the number of fibers, the width of the fan, the curl angle, and how the base pinches. The result is a set that moves more naturally and retains better, because each fan is engineered for the exact lash it's placed on.
At Beauty Power Studio in San Jose, CA, handmade fans are the standard for all volume work. The control they give over weight distribution is simply irreplaceable when you're building a full set on a client with fine, sparse naturals.
Handmade fans also give you an edge when training other artists. Understanding the fan-making mechanics — why a base closes, why fibers split, how adhesive volume affects retention — makes you a better technician at every level.
What You Need: Tools and Lash Specifications
| Tool / Supply | What It Does | Why It Matters |
|---|---|---|
| Curved volume tweezers (Jupiter) | Pick up and fan lash fibers | The curved tip gives you a natural resting angle so you're not fighting gravity while building the fan |
| Straight isolation tweezers (Saturn) | Isolate one natural lash | Precise isolation prevents stickies and protects the natural lash cycle |
| Volume lash tray (0.07mm C/CC curl) | Source for fan fibers | 0.07mm is the most versatile diameter for 2D–5D fans; PBT fiber holds curl under humidity |
| Ultra-thin lash tray (0.03mm mega volume mix) | Source for 8D–16D fans | At 0.03mm, you can build mega volume fans without exceeding safe weight limits for the natural lash |
| Lash adhesive (0.3s dry / black) | Bond the fan to the natural lash | A fast-dry adhesive gives you control over the window between dip and placement |
| Lash stone or jade plate | Adhesive dispenser | Keeps a fresh drop of adhesive at correct temperature; refresh every 20–25 minutes |
| Hygrometer | Measures room humidity | Optimal range is 45–65% RH; outside this range adhesive cure time shifts unpredictably |
Step 1: Choose Your Lash Diameter and Fan Size
Fan size and lash diameter determine the total weight placed on each natural lash. The standard safety rule is to keep the total extension weight at or below the natural lash weight. A rough guide:
| Diameter | Max Safe Fan Size | Style Result |
|---|---|---|
| 0.07mm | 2D–5D | Russian volume, defined fluffiness |
| 0.05mm | 3D–7D | Volume, soft fullness |
| 0.03mm | 8D–16D (mega volume) | Mega volume, maximum drama with minimal weight |
For most first-time volume sets on a client with average-density naturals, start with 0.07mm in a 3D or 4D fan. This gives a visible fullness increase without putting the natural lash under structural stress.
Match your curl choice to the natural lash curl. C curl works for most clients. CC curl adds lift for clients with downward-growing lashes. D curl is for drama sets only — it opens the eye aggressively and looks unnatural on clients with naturally straight lashes.
Step 2: Isolate the Natural Lash

Pick up your isolation tweezers in your non-dominant hand. Position the tip at the root of the natural lash you're targeting, sliding it through the lash line to separate one lash cleanly from its neighbors.
The isolation point should be 0.5–1mm from the eyelid skin — close enough to protect the base but not touching the skin, which would cause glue contact and potential irritation.
Hold the isolation steady throughout the entire fan-making and placement process. The moment you release isolation, you risk stickies. If your isolation tweezers are slipping or fatiguing your hand, the tip calibration is off. The fiber-tip Saturn isolation tweezers have a textured grip zone that reduces hand fatigue on long sets.
Do not proceed to Step 3 until your isolation is stable and you can hold it without tension. This is the most underrated step in volume lashing. Poor isolation is the root cause of almost every premature fan loss and skin reaction in the industry.
Step 3: Pick Up Multiple Fibers from the Tray

Switch to your volume tweezers in your dominant hand. Approach the lash tray at a shallow angle — around 15–20 degrees from the surface. Grip the group of fibers approximately 1–2mm from their base, not at the tip. The grip point is critical: too far down the fiber and you lose control of the fan opening; too far up and the base won't close cleanly.
For a 4D fan using 0.07mm lashes, press the tweezers gently into the row until you feel 4 fibers compress. Lift slowly and straight up. If fibers from adjacent rows follow, you picked up from the wrong row or your tweezers are pressing at an angle.
Check before fanning: all 4 fibers should be flush at the base and aligned in one direction. If any fiber is crossed or reversed, put them back and start again. A crossed fiber in your fan means the finished fan will have one spike out of alignment — it shows on the client and weakens the bond point.
Step 4: Open the Fan (3 Methods)
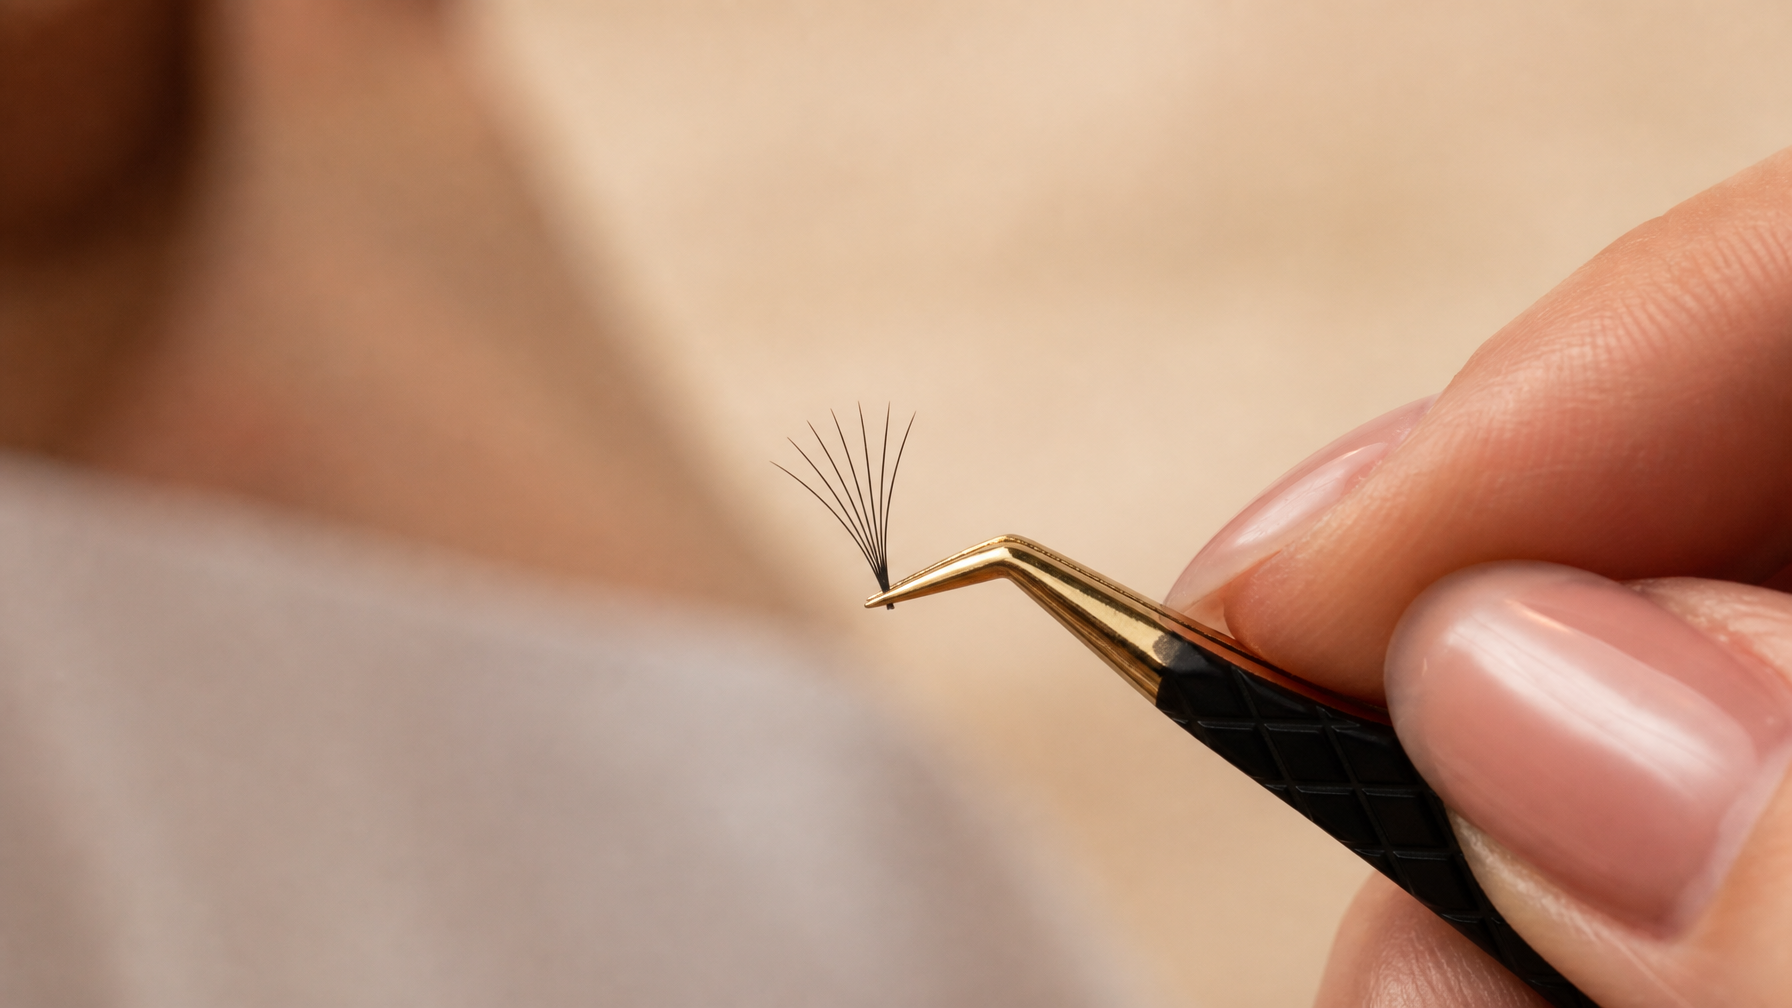
There are three main methods for opening a handmade fan. All three work; the best one for you depends on your tweezers and the diameter of lash you're using.
Method 1: The Shimmy
While holding the fibers loosely near their base, use a gentle side-to-side rolling motion with your tweezers. The fibers spread outward by friction. This works especially well with 0.03mm mega volume lashes because the ultra-thin fibers respond to very light pressure. The shimmy produces a soft, natural-looking fan. The risk: if you shimmy too aggressively, the fibers splay unevenly.
Method 2: The Pinch Method
Hold the fibers loosely, then gently close your tweezers to compress only the very tip of the base — around 0.5mm. This pushes the fibers outward from a central pinch point. Release and the fan springs open symmetrically. Good for 3D–5D fans. This method gives very consistent fan symmetry because the opening is mechanical rather than friction-based.
Method 3: The Pinch and Roll
This is the advanced version of the pinch method. After the initial pinch opens the fan, you rotate the tweezers slightly inward (toward you) by about 5–10 degrees. This "rolls" the base so the fan opens on one plane, giving you a flat, uniform fan rather than a twisted one. The curved Jupiter volume tweezers are designed for exactly this motion — the tip geometry matches the angle of the roll. Most experienced lash artists default to this method once the muscle memory sets in.
Fan width target: for a 4D fan to look natural, the outer fibers should spread approximately 1–1.5mm from the center at the tip. Wider than 2mm produces a starburst effect that sits unnaturally. Narrower than 0.5mm and you've essentially made a handmade premade with no real volume benefit.
Step 5: Check Symmetry Before You Dip
Hold the fan in your tweezers and tilt it slightly toward a neutral light source. Every fiber should splay from the same base point. The gaps between fibers should be approximately equal. The base — the part that will bond to the natural lash — should be closed into a single point, not spread.
Common problems at this stage:
- Uneven gaps: One fiber has pulled ahead of the others. Close the fan slightly and re-shimmy from scratch.
- Open base: The base did not close after fanning. This means you fanned from too far up the fiber. The fan will sit wide on the natural lash and bond poorly.
- Twisted fan: Fibers cross each other at the midpoint. Discard and start over — a twisted fan cannot be fixed after adhesive is applied.
- Unequal fiber count: You picked up 5 when you wanted 4. Count before you proceed.
This quality check adds about 2–3 seconds per fan but saves you from re-doing placed extensions and from client callbacks about fans falling off. Speed comes with practice; accuracy is the foundation.
Step 6: Adhesive Application
Dip only the closed base of the fan into the adhesive — the very tip, approximately 0.5–0.75mm deep. Move in slowly, touch, and pull straight out. The adhesive should coat just the base point. If you see adhesive climbing up the fibers, you went too deep or your adhesive drop is too old (thickened). Replace the drop and try again.
Adhesive volume is one of the most misunderstood variables in volume lashing. Too much adhesive makes the fan splay shut once placed and creates a clumping effect on the client. Too little and the bond fails within the first wash cycle. The correct amount looks like a clean coat on the base only — not a visible bead, not a dry swipe.
The Beauty Power Insider 5ml adhesive has a 0.3s dry time, which at 50–60% humidity gives a placement window of approximately 1–2 seconds. This is enough time for experienced artists to check their fan angle and adjust before the bond sets. If your adhesive is drying before you can adjust, your humidity is too high or your room is too warm.
Step 7: Placement and Wrapping

With the isolation held steady in your non-dominant hand, approach the natural lash from directly above. Lower the fan base onto the natural lash at 0.5–1mm from the root. The fan should land with both outer fibers framing the natural lash symmetrically.
Once contact is made, use the tweezers to gently press and slide the base down the natural lash by 0.5mm toward the root. This "wrapping" motion ensures the adhesive contacts the natural lash on 2–3 sides of the base rather than just the bottom, which roughly triples the bond surface area.
Hold contact for 1–2 seconds. Release isolation only after you feel the adhesive has set enough that the fan does not shift. Do not blow on the lash to cure — this whitens the adhesive and weakens the bond. Let the ambient humidity do the work.
Check the placement from above: the fan should be symmetrical, the base should not be visible on either side of the natural lash, and the surrounding natural lashes should be free with no stickies. If a sticky is found, separate it immediately with your isolation tweezers before the adhesive fully cures — waiting more than 2–3 minutes makes separation much harder and risks pulling the natural lash out.
Pro Tips from 17 Years of Lashing
- Fiber-tip tweezers change everything. Standard metal tips slide off ultra-thin lashes. Fiber-tip tweezers grip at a molecular level — you can work with 0.03mm lashes without dropping them or squashing the fibers. The Mercury + Earth fiber-tip set covers both isolation and volume work so you never need to reach for a third pair.
- Work in rows, not randomly. Complete one row across the lash line before moving to the next. This lets you track density evenly and spot gaps before the client's eye is opened at the end of the appointment.
- Refresh your adhesive drop every 20–25 minutes. Adhesive thickens rapidly on the jade stone due to ambient moisture. Using old adhesive is one of the top causes of poor retention — the viscosity is wrong for fanning and the cure time is unpredictable.
- Your fan-making speed is a skill, not a talent. Most artists can make one clean fan per 8–12 seconds after 3–4 months of regular volume practice. Set a timer and track your count per minute. Improvement is measurable.
- If your fans keep collapsing on placement, check your grip point. You are likely gripping too far up the fiber, so the base cannot close. Move your grip 0.5mm closer to the lash base and repeat.
Frequently Asked Questions
What diameter lash should I use to make volume fans?
0.07mm is the standard starting point for 2D–5D fans on most clients. For 6D–10D fans, use 0.05mm. For mega volume (10D+), use 0.03mm. The total weight of the fan must stay proportional to the natural lash's weight capacity — thicker naturals can support a heavier fan, fine naturals cannot.
Why do my volume fans close back up after I make them?
This usually means the adhesive is wicking into the fan before you place it. Either your adhesive drop is too fresh (still has high surface tension pulling the fibers) or you are dipping too deep. Dip only 0.5mm of the base. Another cause is using a non-PBT lash fiber that has low static charge and won't hold a spread.
What is the difference between the shimmy and pinch-and-roll method?
The shimmy uses friction and lateral movement to spread the fibers — it produces a soft, natural-looking fan and works well for 0.03–0.05mm diameters. The pinch-and-roll uses a controlled compression at the base followed by a slight rotation, producing a more symmetrical, flat fan. Most experienced artists prefer pinch-and-roll for 0.07mm+ lashes because the thicker fibers hold the position after the roll.
How many lashes should a volume fan have?
This depends on the diameter and the natural lash's strength. A general rule: 2D–5D fans with 0.07mm, 4D–7D with 0.05mm, and 8D–16D with 0.03mm. Do not exceed what the natural lash can support — overloaded naturals break mid-shaft and cause long-term damage to the follicle.
What tweezers are best for making volume lash fans?
Curved volume tweezers with a fine, gripping tip are the industry standard. Fiber-tip tweezers offer the most control for ultra-thin lashes (0.03–0.05mm) because the grip is non-slip at the molecular level. The tip angle should match your working posture — most artists prefer a 45–65 degree curve. The Jupiter curved tweezers are built specifically for the pinch-and-roll motion.
Why does my fan stick to the lash tray when I try to pick up multiple fibers?
The lash fibers have static buildup that clings to the tray adhesive strip. Work from the back rows of the tray first; front rows get handled more and lose their strip adhesive faster. Lift at a very shallow angle — nearly parallel to the tray — rather than pulling straight up, which creates suction. Also check that your tweezers are clean; adhesive residue on the tips increases friction.
How do I know if my fan base is too wide before placing it?
A correctly closed base should look like a single point from above. If you can see two distinct lines at the base (a "V" shape), the base is open. An open base creates poor retention because the adhesive bond is split across two points rather than concentrated at one. Roll the base again or discard and re-pick.
What's the right humidity for making volume lash fans?
45–65% relative humidity is the working range for most lash adhesives. Below 45% RH, the adhesive cures too slowly (extending your placement window but increasing fume exposure). Above 65% RH, it cures in under a second, giving you almost no adjustment time once the fan contacts the natural lash. A simple digital hygrometer on your lash cart keeps you within this range.
Shop the Toolkit for Volume Lash Artists
- Fiber Tip Curved Volume Tweezers - Jupiter — built for shimmy and pinch-and-roll techniques
- Fiber Tip Isolation Tweezers - Saturn — precise isolation without hand fatigue
- Fiber Tip Tweezers Set of 2 - Mercury + Earth — covers isolation and volume in one kit
- Volume Lash Extensions 0.07mm — C/CC Curl Tray — 16-row tray, PBT fiber, ideal for 2D–5D
- Volume Lash Extensions 0.05mm — C/CC Curl Tray — for 4D–7D fans
- Volume Lash Extensions 0.03mm — Mega Volume Mix — C, CC, D curl mix for mega volume sets
- Lash Extension Adhesive Insider 5ml — 0.3s Dry — fast-dry black adhesive for volume work
Browse all lash extension supplies at beautypower.pro/collections/lash-extensions. Available on Amazon and on our website: https://beautypower.pro
Related Reading:
- Classic vs Volume Lash Extensions: Which Style Is Right for You? (2026)
- Anime Lash Extensions: The Complete Guide to Spiky Manga Lashes (2026)
Viktoryia Tsishko is a licensed esthetician with 17 years of professional experience and the founder of Beauty Power. She has trained 30,000+ beauty professionals worldwide and developed Beauty Power's full line of professional-grade tools used by 1,000,000+ customers. Her tools earned the Allure Best of Beauty 2025 Award. Viktoryia also runs Beauty Power Studio in San Jose, CA, specializing in lash extensions and brow services.